Sunday, January 29, 2012

Travel thread catcher...

We had our first Neuse Quilters beach retreat three years ago
and I wanted our first trip to be special
so I made each participant a recycled denim koozie square
with their initial on it!!
They had to sew it together , of course!!
Well I had an extra one with my initial that I used for demo purposes...


and I needed/wanted a travel thread catcher
to use from room to room and for workshops.


Here I used sand to fill the little bag to weigh it
and a good old Tupperware lid to draw my circle. I add
some batting to fill in the circle.


Another guild member and I have been embellishing with buttons a lot 
lately , so I decided why not add some here too!!

Here are two other demo examples w/o my initial that come 
in handy as  fabric baskets...


they keep my floor items near my ironing board a 
bit neater!!

I am very pleased with my little catcher...
Do you have an extra one that is special to you??


Blessings on this gorgeous day in North Carolina
that the Lord has blessed us with!!
Kathy

Thursday, January 26, 2012

Baby quilts for EPIC...

Our guild, Neuse Quilters, 
ask each member to complete at least two quilts for charity each year...
well needless to say, I have been a bit behind...for a while!!


We all have made these three quick quilts,
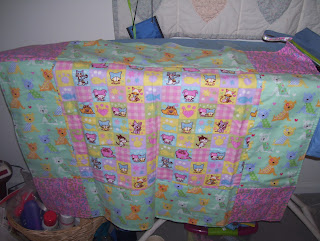
Super Size Nine Patch
by Anita Grossman Solomom
also featured in May/June 06 Quilt Maker Magazine


and a quick label method here...


I am donating these to our local pregnancy crisis center which I like to support.
They ONLY offer pregnancy counseling and adoption support
which I like!!

Their website is listed here for those interested...


Blessings all,
have a good weekend!!

Kathy

Friday, January 20, 2012

NQG Challenge quilt for 2012...

Our Neuse Quilters Guild
has a challenge quilt every year and the challenge is given out
at our annual Christmas party.
I am determined to start and finish mine this year,
so I have started!!


I am finding that I need a little more contrast in my fabric...
shop hop is coming soon 
so I know what I will be looking for!!!


I saw this pattern on 
Notes of Sincerity's blog (her blog)
and she gave me the pattern which I found on
Crazy Mom Quilts (her blog)
listed as Elia's quilt...

Thanks for sharing ideas girls...

Blessings,
to be continued...

Kathy

2 Cor 2:14
thanks be unto God who causes me to triumph in Christ Jesus

Wednesday, January 18, 2012

Chicken tacos...yum

I got this delicious recipe from
Pioneer Woman...do you know about her and her cookbooks 
and now Food TV show on Saturday mornings?


I have prepared it twice now and we really like it...
just take a look at Cliff's face!!


Ingredients

  • 16 whole Corn Tortillas (small Size)
  • 4 whole Boneless, Skinless Chicken Breasts, Cut Into Pieces
  • Salt, Cumin, Chili Powder To Taste (or Use Taco Seasoning)
  • 2 Tablespoons Canola Oil
  • 2 cans (4 Ounce) Diced Green Chilies
  • 1-1/2 cup Finely Grated Cheese (cheddar Or Cheddar/jack Mix)
  • Sour Cream
  • Hot Sauce (Chulula Or Other Brand)
  • 2 cups Thinly Sliced Romaine Lettuce (or Any Lettuce)
  • 4 whole Roma Tomatoes, Diced
  • Canola Oil, For Frying Tacos
Season diced chicken liberally. Heat 2 tablespoons oil in large skillet over medium-high heat. Add the chicken and cook for a couple of minutes. Dump in the diced green chilies. Stir and cook until chicken is totally done inside. Turn off heat and set aside.
Have all other ingredients---grated cheese, sliced lettuce, diced tomato, sour cream, and hot sauce---ready.
Also have a plate ready, as well as a stack of five or six paper towels to hold in your hand.
TO FRY
To fry the tacos, heat a couple of inches of canola oil in a heavy skillet over medium-high. Place some chicken in the middle of a tortilla, then fold tortilla in half. Clamp the tortilla shut with a pair of heat-proof metal tongs, then carefully lay the taco---one side down---in the oil. As you lay it in the oil, use the tongs to hold the top side down for a few seconds to form it in place. Once it stays put, repeat with two other tacos. Turn tacos after 30 to 45 seconds, or when each side gets light golden brown (not too brown.)
One at a time, remove tacos from the pan with tongs, holding sideways as you remove them to allow oil to drip out of the sides. Place the taco in the stack of paper towels. Fold the sides and corners around the taco to tightly hold it, then give it three or four shakes to remove excess oil. Remove it from the paper towels and place on a plate. Repeat with other tacos in the pan.
As you continue frying the other tacos, have someone carefully place some grated cheese inside the tops of the tacos (gently pry them open just enough to place the cheese in). Then just let them sit until ready to serve---the cheese will melt as it sits in the warm taco.
To serve, garnish in this order: a smear of sour cream, dashes of hot sauce, shredded lettuce, diced tomato. You'll need to slightly open up the tops of the tacos to get all the garnishes in there.
Tacos will be hot for a minute or two after frying, so don't rush into eating! They'll stay nice and warm for a little while after frying.
Here is her web site for you to enjoy...


Blessings and enjoy!!

Kathy

Friday, January 13, 2012

Cherries in winter...

A while back, I found this vintage table cloth
at a yard sale for $3.00.
Just the kind of find I love...it had a few small holes
but what the heck, I can figure a creative way to cover them.
On a shop hop, I purchased the cutest "Oh Cherry" fabric by Moda
that matched perfectly...
So
why not make it into a quilt???


Here is the top with the borders.
Now I just have to add the backing and I will have a fun
picnic quilt.


What ideas do you have for helping me
cover these small holes?????


Blessings,
Kathy

Monday, January 2, 2012

Charming wall hanging complete...

I am about as excited as I have ever been in completing
a quilt!!
But then, this is not just any old quilt...


It all began  in January 2010 
when I was at our guild and someone had some 
"free" quilting magazines
and this wall hanging was on the cover.
"Charming" by Carol Armstrong.


McCalls Quilting April 2007

I was "charmed" from the first look.
So, I took the magazine home and quickly opened it up
to page 56 where Carol Armstrong's pattern and completed
quilt were pictured with instructions.
I studied it for days trying to decide which fabrics I would use and perhaps would need to get some from friends...but then this would make it special...
Each of the 169  2 inch squares is hand appliqued using needle turn
with three lovely little tear drop flowers on the side.
Of course it is hand quilted and hand embroidered.
Each square is a different nature print and has a perfect green border
to enhance the overall nature theme.

Before I could get started, I realized that the floral
applique pattern sheet was NOT in the back of my magazine.
I had no idea who had owned the magazine.


What did I do??
1. Contacted McCalls who checked their files- No pattern
2. Looked on the internet to see what popped up- No luck
3.Tried to contact Carol Armstrong- No success 

Well, my husband often buys me quilt magazines
(isn't that real nice!!!)
and guess what he brought home???


McCalls Quilting February/March  2010 issue.

AND WHAT WAS IN THE issue????
A QUILTER FROM MISSISSIPPI DISPLAYING HER
VERY OWN "Charming" quilt....
Can you believe it?????????


Mrs. Joan Beasley form Mississippi !!!
who worked on it while her son & grandson were deployed.

SO, I wrote her, after finding someone by that name in the online white pages
and she sent me a copy of her pattern in August 2010...
I mean ...are quilters the best OR what!!!

I began to prepare my muslin fabric for the background by using Southern Belle, my favorite applique fabric. 
I had to mark it in perfect grids to guide placement of each square of fabric. 
So I checked it many times before, during and after to make sure they were straight. Look closely at the following pics to see light blue lines.
I used a water soluble fine point mark-b-gone pen in blue. 
Then I went to my stash and to select fabrics with nature prints...trees, leaves, rocks, flowers, moon, stars, animals, sea shells,frogs, birds, and a few scriptures which would make it special...

I began appliqued the squares in the center first


Since our God is the maker of all things, I thought I would place Him in the center.


 trying to make sure the colors were spread out
to make it appealing to the eye.
Then I appliqued the flowers and embroidered the stems.


Friends gave me fabrics and I hunted for the perfect 
green for the border.


It has been a delight to work on and a challenge with all of the 
needle turn applique and hand quilting..


Here are some pictures of my progress along the way.


I love using Downy Wrinkle Release to steam out those seams.


Layering & Basting

 I often use Thermore poly for wall hanging batting
but this time I used Dream Cotton 
and I really like the way the appliqueing and hand quilting looks.


Supplies used were Y L I 
silk for appliqueing,
cotton quilting thread and
basted with Sulky neutral .


and embellished with beads...


AND where does this completed 
January 2012 master piece get the privledge of hanging?


On my sewing room door, of course.
That way I can look at it every time I come and go!!


Blessings,
Kathy
and how blessed I feel to have been blessed with these talents...


oh....I am sending a copy to Mrs. Beasley to thank her...and to McCalls too
look for a post in the future.